Run your restaurant on Anna Eats
Everything you need, in plain words. New to Anna Eats? Go to anna-eats.com, tap Log in, then "Create one" and use the email your restaurant is registered with. Already have an account but forgot your password? Tap "Forgot password" on the sign-in page.

Getting started
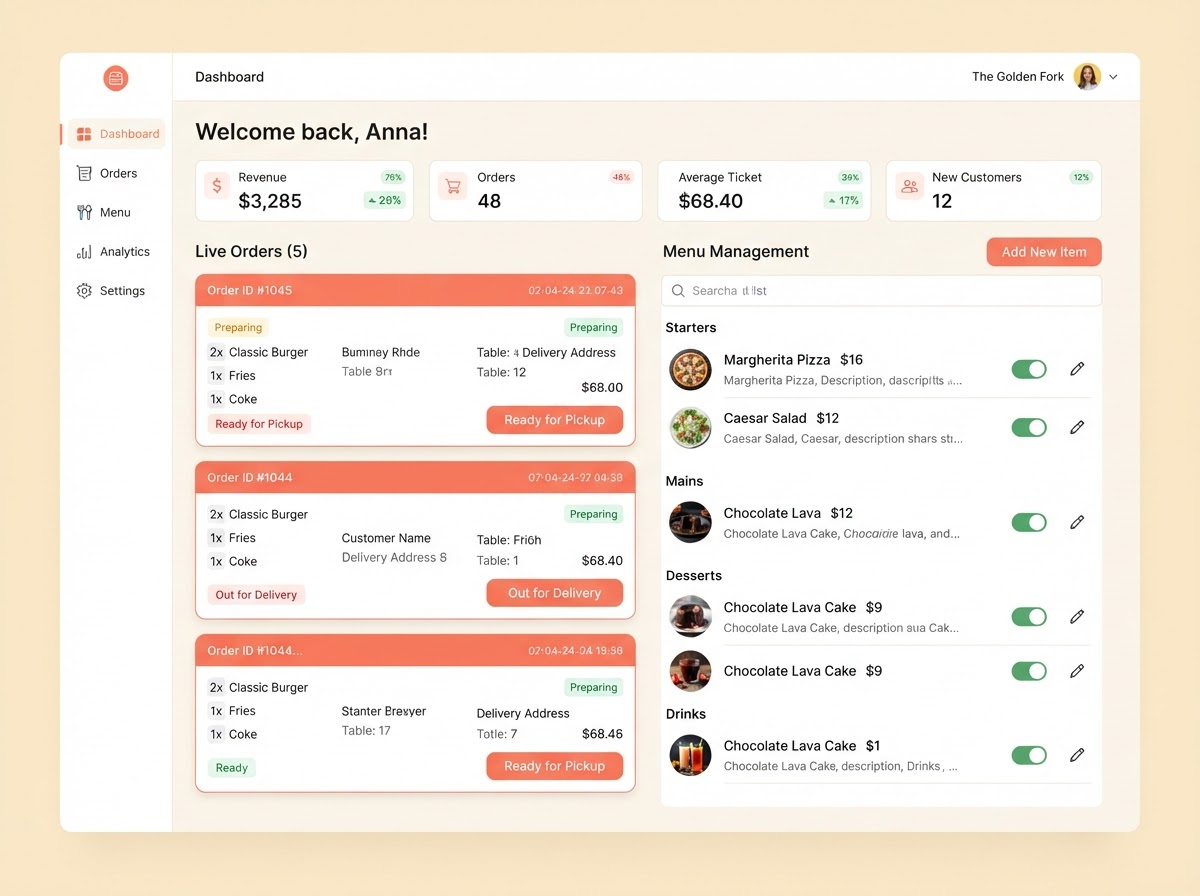 Illustration1
Sign in
Go to anna-eats.com and sign in. You land on your Restaurant Dashboard, your home base.
 Illustration2
Finish set-up
See "Your restaurant is offline"? Tap "Finish set-up". You get a checklist: details, opening hours, menu, delivery zones and Stripe. Each step turns green when done.
- 3
Your details
Dashboard > Settings > General. Add your name, address, phone and email.
- 4
Opening hours
Settings > Opening hours. Pick the times you open each day, and add days you are closed.
- 5
Your menu
Settings > Menu. Add dishes, prices and photos. Short on time? Use "Scan menu" to take photos of your paper menu.
- 6
Delivery zones
Settings > Delivery. Tap to add a zone, type the postcode area you deliver to (for example G32 or NE24), then set the delivery fee and minimum order. Add one zone per area. Only doing collection? Turn on "Collection only" in Settings > General.
- 7
Your look
Settings > Branding. Upload your logo and a nice photo for customers to see.
- 8
Get paid online
Settings > Tools and connections > "Connect Stripe". Fill in the whole Stripe form (business, bank account, ID) so online card payments reach your bank. Back on Anna Eats, tap "I finished on Stripe - check again".
- 9
Go live
When every step on the Finish set-up checklist is green, tap "Go live". Customers can now find you and order online. You can still change anything later.
- 10
Card machine (Teya)
Settings > Tools and connections > "Connect Teya POSLink". Sign in with the Teya account of this restaurant, then pick your card machine under "Card terminal".
- 11
Turn on POS payments on the card machine
Important: on the Teya card machine itself, open Teya Payments > menu > Payment settings and turn on the option that lets the machine take payments from a POS (POS integration / POSLink). Without it the till and kiosk wait for payment but nothing appears on the machine.
- 12
Kiosk card machine
Using a self-order kiosk? On the kiosk tap the gear icon (top right) and choose which card machine the kiosk uses. Each kiosk can use its own machine.
Every day
- Illustration1
New orders
Dashboard > Live. New orders ping with a sound. Tap Accept, then Ready, then Collected.
- Illustration2
Take payment at the till
Tap "Open till". Tap dishes to add them, then choose cash or card. Card goes to your Teya machine.
- 3
Kitchen screen
Open the Kitchen display link on a kitchen tablet. Orders show as tickets. Tap to start, tap when ready.
- 4
Tables and waiters
Set your tables in Table Layout. Waiters log in with their PIN, add food to a table and take payment.
- 5
Kitchen and bar
In Kitchen & Bar, choose which food goes to the kitchen and which drinks go to the bar.
- 6
Other screens
Screen links give short web addresses for the till, kiosk and TV menu. Type them on any device.
- 7
Staff
Give each staff member a 4-6 digit PIN. They clock in and out with the Time Clock.
- 8
See how you did
Today, History and Reports show your orders and sales totals.
Settings
- 1
General
Your details, open or closed, and collection only.
- 2
Delivery & collection
Where you deliver, delivery prices and minimum order.
- 3
Printers
Which printer prints receipts and kitchen tickets, and auto-printing.
- 4
Kiosk & screens
Turn on the self-order kiosk, kitchen screen and TV menu.
- 5
Reservations
Table bookings, deposits and largest group size.
- 6
Notifications
Order sounds, volume and emails.
- 7
Money & bank
Fees, payouts, statements and your bank details.
- 8
Documents
Your restaurant papers and the platform terms.
Need help? Contact support